Chapter II - Setup Webpack for JS build with babel
In this chapter we'll introduce Webpack to the project. It's main purpose is to bundle JS and CSS for the frontend stack. Secondly we will exploit Webpack's HMR feature to the maximum to enhance the Developer experience. If all goes according to plan, each change will almost instantly be reflected in youw browser without haven to manually refresh!
Installing packages
yarn add -D webpack webpack-cli @babel/core @babel/preset-env babel-loaderThe webpack is the core package that does the actual compiling.
webpack-cli is responsible for providing a CLI
interface. This doesn't do much as long as we don't have a configuration, so let's move on to the next step!
The Babel packages are explained below.
Configuring Webpack
Since we have some configuration options needed in different places, we should put them in a separate file ie.
/src/config.js:
const path = require("path");

module.exports = {
    isProd: process.env.NODE_ENV === "production",
    hmrEnabled: process.env.NODE_ENV !== "production" && !process.env.NO_HMR,
    distFolder: path.resolve(__dirname, "../dist"),
    publicPath: "/assets",
    wdsPort: 3001,
};
These options will be explained as soon as they're being used. Create a webpack.config.js file containing following
minimal configuration:
const config = require("./src/config");

var webpackConfig = {
    entry: {main: ["./src/client/main.js"]},
    output: {
        path: config.distFolder,
        filename: "main.bundle.js",
        publicPath: "/assets/"
    },
    mode: config.isProd ? "production" : "development",
};

module.exports = webpackConfig;
The entry option contains so called entry points, those files are used as a starting point to detect the dependency
tree of your frontend bundle. This is exactly what webpack does: it parses your code, looks for dependencies
(supporting multiple ways to declare them) and compiles everything to a single 'bundle' which is usually a JS file.
output defines where Webpack can put the resulting bundle and how to name it. You can also see the publicPath
option. This needs to be the URL path of where the bundle will be located inside your website.
If mode is set to production, Webpack will pre-configure some plugins to optimize and minify your bundle.
In this config I have 1 entry which uses /src/client/main.js and call it "main". Webpack will output a JS file
/dist/main.bundle.js.
Speaking of which, we should now create that entry file:
// /src/client/main.js
console.log("Hello, from src/client/main.js with love");
Don't worry much about that content, we wil add more useful things later. This will be the file where you start coding (or requiring) your frontend modules.
Testing the build
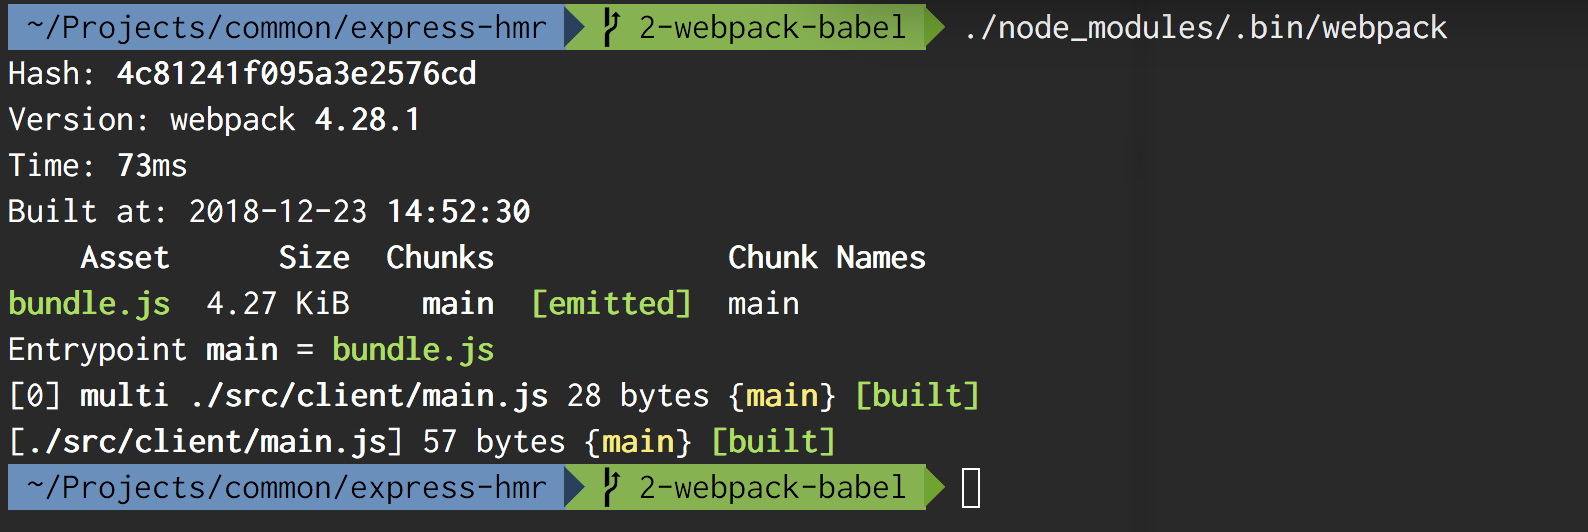
We're ready to give Webpack a go. Run following command to build your frontend bundle:
./node_modules/.bin/webpackAfter running the build, you should see that /dist/main.bundle.js has appeared in your project. You should see
a result like this:
Adding the bundle to your HTML
Before we can add the bundle to the webpages, we'll need to tell Express you want this folder to be served as
"static assets". Require the config to configure the static middleware with ease. I suggest putting the middleware
after the already existing express.static statement.
// /src/server/app.js
const config = require("../config");
...
app.use(config.publicPath, express.static(config.distFolder));
You don't need to delete the /public folder or remove the other express.static statement. This can still be used for
other assets you don't want Webpack to process.
Now add the script tag to your website's HTML:
// /src/server/views/layout.twig
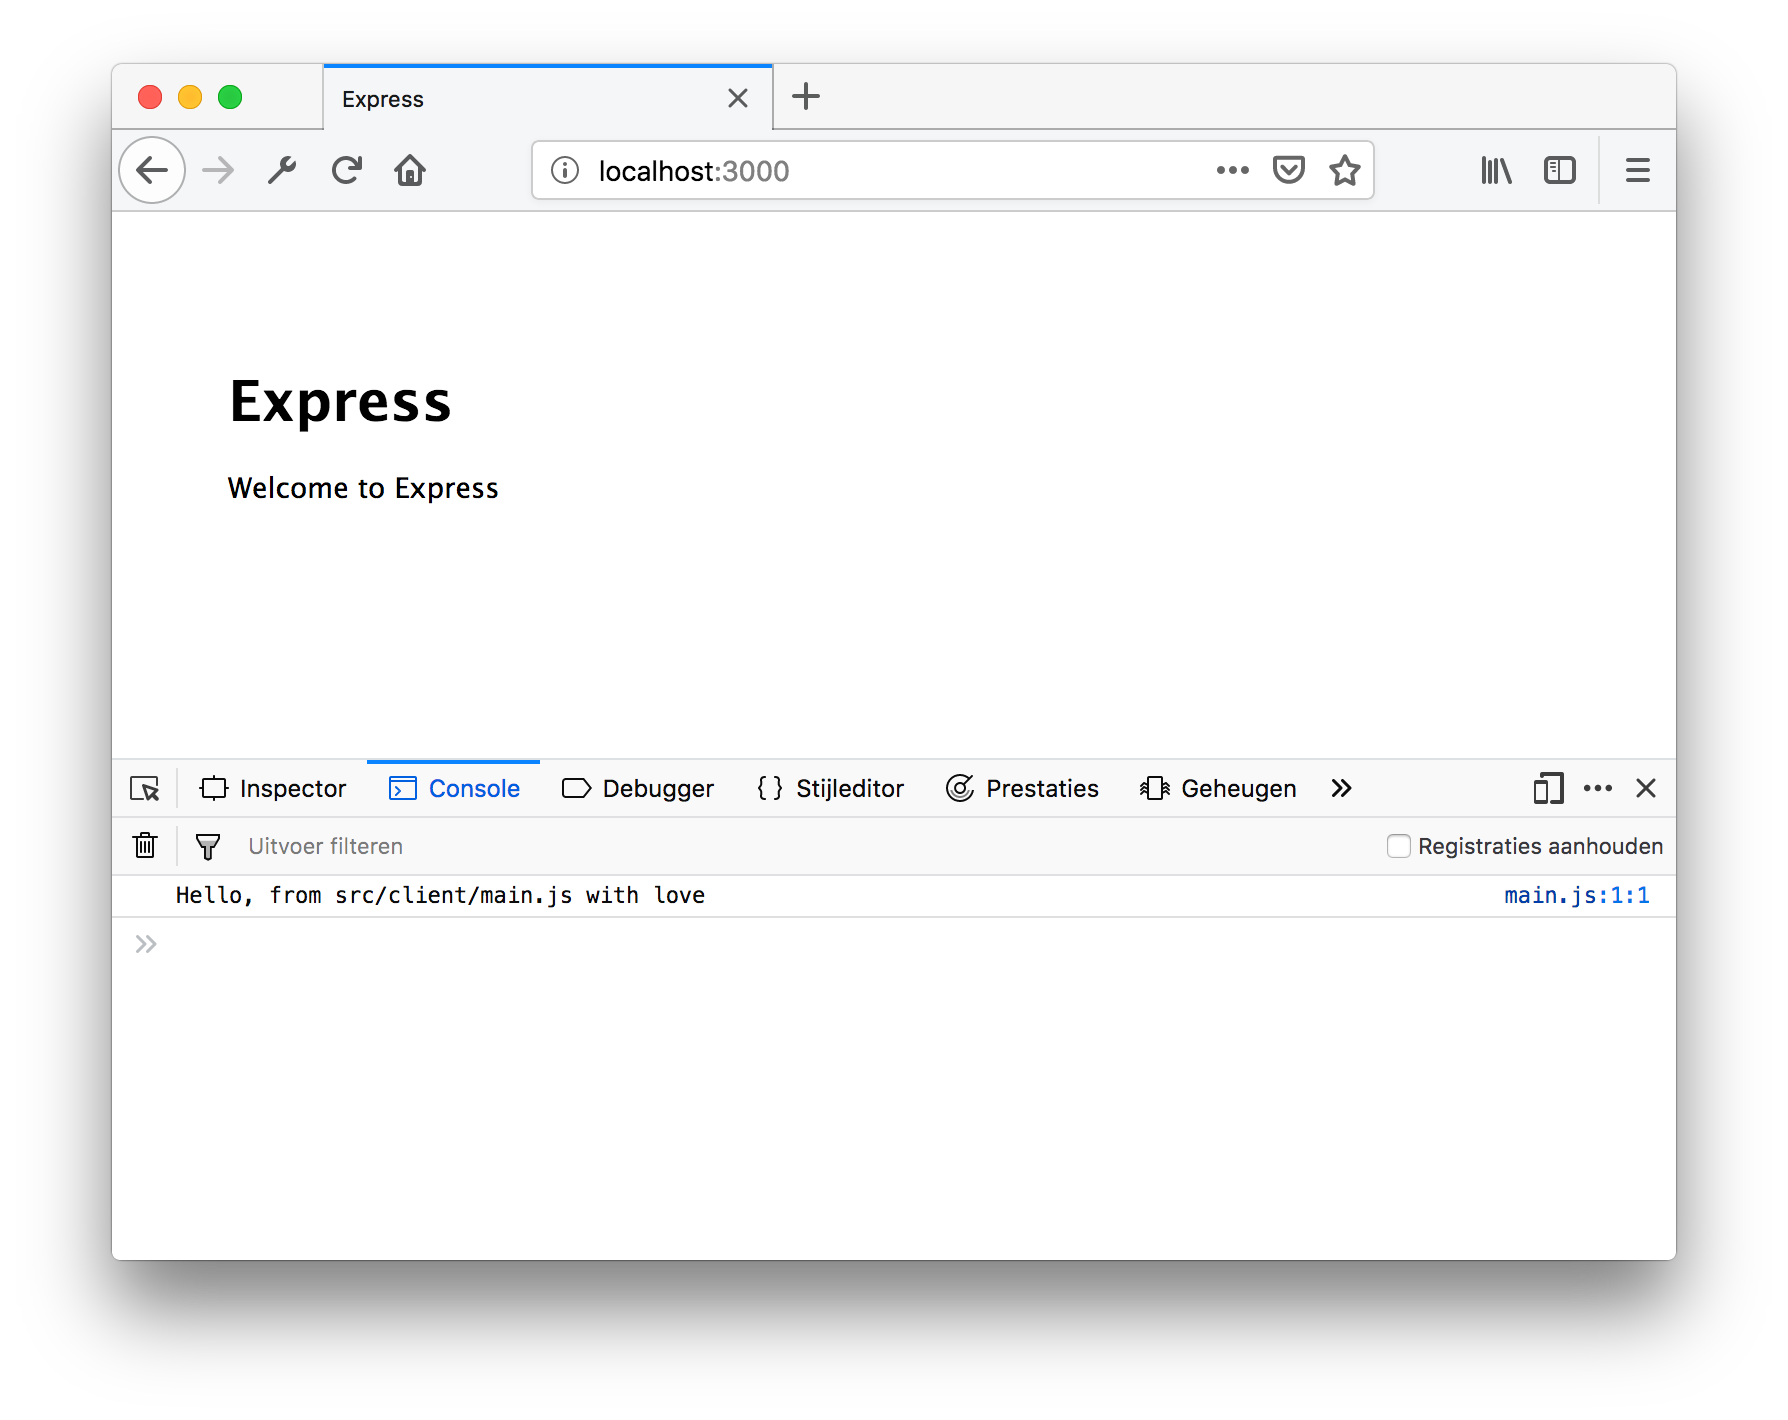
<script src="/assets/main.bundle.js"></script>Make sure your app is running (yarn start), point your browser to the page http://localhost:3000 and open the dev
console in your browser. You should see the loving message appearing from our bundle.
Adding Babel
Webpack loaders
Webpack knows how to handle JS files by default, but you can extend support for additional file types by adding
so-called 'loaders'. Ie. if you add require("style.css") to your entry, you'll need to add the style-loader to
the webpack config so webpack knows how to include the CSS into the bundle (and applying the styles upon loading).
For now, we want to improve how JS is being handled by adding Babel. If you haven't heard of it, Babel js is a compiler that supports the latest syntax and features (ES6, ES2015, ...) and transpiles it to older Javascript that browsers can understand.
We already added 3 dependencies to our project:
@babel/coreis the actual compiler@babel/preset-envis a preset that automates configuration based on browsers you wish to supportbabel-loaderis the Webpack 'loader' which will integrate Babel into your Babel stack
In Webpack, adding Babel is piece-of-cake. Just add the babel-loader in our webpack.config.js:
...
    module: {
        rules: [
            {
                test: /\.m?js$/,
                exclude: /(node_modules)/,
                use: {
                    loader: 'babel-loader',
                    options: {
                        presets: ['@babel/preset-env']
                    }
                }
            }
        ]
    }
...
Webpack uses a rule-based architecture to determine which loaders are used for which regex matches. In this case, we
look for any .js or .mjs files, exclude dependencies in the node_modules folder and use the babel-loader for any
matching files.
You can test the setup by adding some ES6/7/2015 syntax in your /src/client/main.js and run webpack.
Tip & Tricks
You can also install Webpack globally (npm install -g webpack webpack-cli). If you do that, you can simply run
the webpack command.
Keep in mind that the code in the bundle won't change by itself. You need to re-run the webpack command every time
you make a change. However, Webpack also has a built-in watch feature. Just run webpack -w and it will watch all files
in the dependency tree of your client code and rebuild when you make a change.
Conclusion
You can now run Webpack manually to build your frontend bundle. This is a basic but workable setup. The focus of this book however is to add more automation to webpack and integrate it deeper in your app. We want webpack to build the bundle upon start, trigger re-build automatically upon changes and signal the browser so it reloads.
After completing this chapter, your app should look like the sample app in the chapter-2 tag.
Further reading
- https://webpack.js.org/api/cli/
- https://webpack.js.org/loaders/
- https://github.com/webpack-contrib/awesome-webpack
- https://babeljs.io/
- https://babeljs.io/docs/en/babel-preset-env